Short answer:
The RoughCut script for DaVinci Resolve converts your written script into a rough cut. Drop in your footage, and it transcribes everything automatically, then assembles it on your timeline—synced and matched to what you actually wrote. You’re looking at minutes instead of the usual hours hunched over the timeline.
If your videos are scripted and you’re still hunting through takes manually, you’re burning the most expensive thing you have: time.

The Problem: Rough Cuts Are Eating Your Edit Day
Every scripted YouTube video follows the same painful loop:
- Record multiple takes
- Import footage
- Scrub through each clip to find the best take
- Manually cut it to the timeline
- Repeat — for every single line
A 10-minute video? Your rough cut stage eats 2–3 hours alone. And you haven’t touched the actual edit yet.
The rough cut is not creative work. It’s data sorting. So stop doing it by hand.

What the RoughCut Script Actually Does
RoughCut is a custom DaVinci Resolve script that kills the rough cut grind entirely. Here’s the actual workflow:
- Paste your script — the exact words you planned to deliver
- Speech-to-text hits every clip — automatic transcription across your entire media pool
- Match script to takes — the script finds which clip nails each line
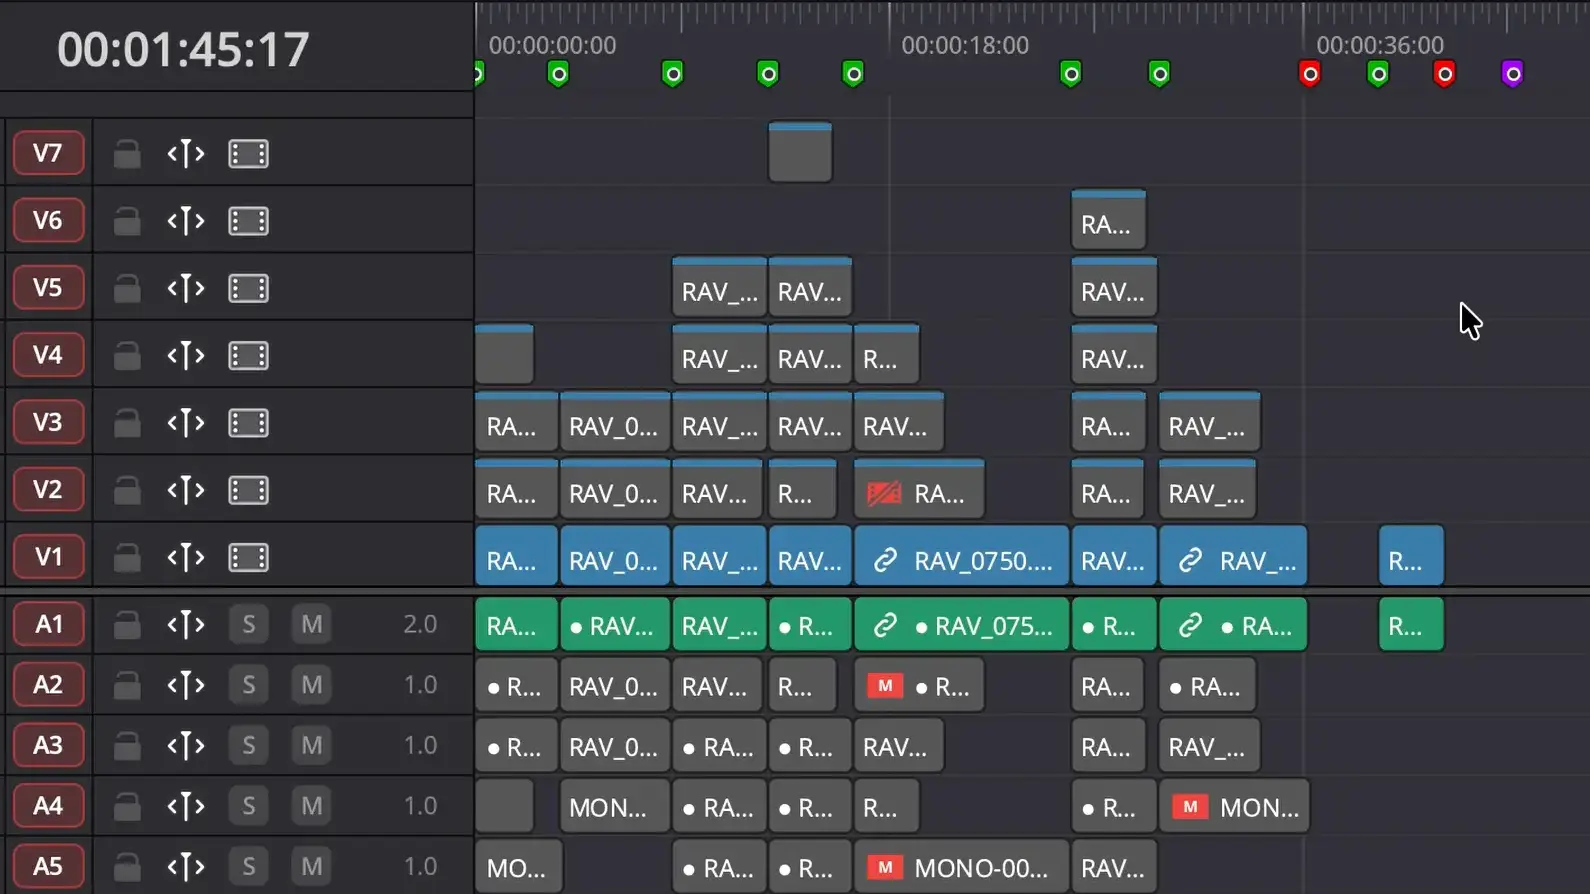
- Build your timeline — script order, best takes locked in, ready for you to shape
No clip dragging. No scrubbing footage you don’t need. You hand it your script and walk away.
Give it your script. Come back to a rough cut that’s already done.
👉 Organize your DaVinci Resolve Media Pool first — this makes RoughCut even faster and that’s genuinely step one before you run it.

The Three-Stage Workflow (From Chaos to Creative Edit)
RoughCut fits into a clean three-stage post-production workflow:
- Stage 1 — Organise: Run the Sort Media Pool script to sort your clips by camera, audio, and type. A clean pool transcribes faster. Full guide here.
- Stage 2 — RoughCut: Paste your script into RoughCut. It transcribes, matches, and assembles — your timeline builds automatically.
- Stage 3 — Creative edit: This is where you actually edit. Trim breaths, add B-roll, colour grade, mix audio. Only you can do this part.
Most editors burn 60–70% of their time in Stage 2. RoughCut collapses that to almost nothing.
Who This Is Built For
RoughCut isn’t for everyone. It’s built for a specific creator:
- You shoot scripted content — YouTube, course videos, tutorials, explainers
- You use DaVinci Resolve as your primary editing tool
- You shoot multiple takes and spend hours finding the best one
- You want to spend your edit time on creative decisions, not grunt work
You improvise everything on camera and skip scripts? This won’t help you. But if your videos are scripted and you’re still cutting by hand — you’re looking at the single highest-leverage tool in your workflow.
If you edit scripted videos in Resolve without automation, you’re choosing to waste time.
A Simple Recipe
- Organise your media pool using the Sort Media Pool script — sort by camera, audio, and clip type
- Download and install the RoughCut script from drrave.com/tools/roughcut into DaVinci Resolve
- Open RoughCut from Workspace > Scripts inside Resolve
- Browse to your video script into the RoughCut interface
- Point the script at your organised media pool and run it
- Review the auto-assembled timeline — best takes, in script order
- Move straight to your creative edit: B-roll, colour, audio, pacing
The Big Truth
The rough cut isn’t where your creativity lives. Stop spending half your edit day locked in that phase.
You’re assembling footage, sure. But you’re not *shaping* anything yet. The real work — the color decisions, sound design, pacing tweaks, the moments that make viewers feel something — happens downstream. Stay in rough cut too long and you’re just moving clips around like furniture in an empty room.
Here’s what kills momentum: getting precious about a rough assembly. You’ll spend three hours finessing a transition that’ll change completely once you grade the footage. You’ll re-edit a scene six times before sound design reveals what it actually needed all along.
Cut fast. Move on. Your instincts about structure are sharpest when you’re not second-guessing shot lengths or junction points that don’t matter yet.
The edit accelerates once you stop treating rough assembly like the finish line. Grade it. Layer in sound. *Then* you’ll see what’s actually broken — and what was fine all along.
Automate the assembly, then pour your energy into the edit that actually makes your video worth watching.

Leave A Comment